How to Add a Map Cycle
A map cycle in Counter-Strike 2 allows your server to automatically switch maps after each match without manual input. This ensures varied gameplay and maintains engagement for players. While you can manually change maps using commands like changelevel or nextlevel, adding a mapcycle.txt file is a more efficient and automated solution.
The next map in the cycle will load automatically after the current match finishes.
Step 1) Go to your Console > click on your server and stop it using the "STOP" button.
Step 2) Once your server is stopped, go to "FILE MANAGER".
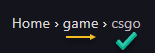
> Then navigate to Home > game > csgo
> Click green New File button located next to the Upload one.
Step 3) In the empty text editor, add any map codes you want to include in the rotation, placing each one on a new line. See the list below the preview for all available CS2 map codes (Standard and Vanity):
| Standard Maps | Vanity Maps |
|---|---|
| de_inferno | de_inferno_vanity |
| de_mirage | de_mirage_vanity |
| de_dust2 | de_dust2_vanity |
| de_nuke | de_nuke_vanity |
| de_anubis | de_anubis_vanity |
| de_overpass | de_overpass_vanity |
| de_ancient | de_ancient_vanity |
| cs_italy | cs_italy_vanity |
| cs_office | cs_office_vanity |
Step 4) When you are done editing, press the "CREATE FILE" button on the right, above the text editor.
> Name the file mapcycle.txt

Step 5) Go back to the Console and "START" the server again. Once the current match ends, the next map in your cycle will automatically load.